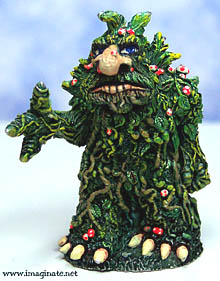
Getting Started Painting Miniatures
If you're new to painting miniatures, you're in for a lot of fun. Transforming a dull piece of metal into an exciting piece you're proud to say you created is a process that's as exciting today as it was when I painted my first miniature.
If you're a veteran of painting, read on as well. I'll reveal a number of tricks I've discovered over the years that I have not found anywhere else.
The Process, Step-By-Step
Painting a miniature involves several steps to achieve results that you will be really pleased with:
- Clean/Prepare the Miniature
- Remove Flash and Mold Lines
- Apply Primer
- Attach to Base
- Decide on a Color Scheme
- Basecoat
- Apply Wash
- Drybrush and/or Blend
- Add Finishing Touches to Base
If you're like me, you'll be tempted to dive right in and start painting. However, this rush to begin may produce results you'll be less than thrilled with.
Give each step the attention they deserve. When I paint, it forces me to slow down and enjoy the process. My blood pressure drops and I can really relax after a hard day's work.

Without a white undercoat, the light areas of this piece would have looked drab.
Prime miniatures with white to achieve the best contrast between light and dark colors.
Removing Paint from Miniatures
If you need to get old paint off before beginning, this is easily done.
Learn How to Remove Paint with Safe, Environmentally-Friendly Cleaners
Prepare Your Miniature for Painting - Cleaning
Before you apply the first dab of color to your miniature, there's a little work to do. Why? Because right out of the package, paint won't stick well to your miniature.
When metal, plastic, or resin miniatures get cast, casters apply a "release agent" to the mold, an oily or powder substance. This allows the miniature to come out of the mold cleanly.
The release agent also prevents paint from sticking to the miniature well, so we must remove it.
Powdered release agents gets into the miniature's cracks, crevices, and fine details. Cleaning the miniature well makes the details really pop out. Until you properly clean a miniature, you don't know what intricate details may remain hidden, so doing this well is really worth the time. Crisping up the edges by cleaning also helps you to find the borders between areas of the miniature, making it easier to paint.
How To Remove Release Agent
The "magic formula" for washing off release agent is as close as your kitchen sink. Any liquid soap you'd use to wash dishes by hand work well. Us a good toothbrush or other cleaning brush to scrub the release agent from your miniatures. Dentists recommend a soft brush to clean your teeth, but for cleaning miniatures, you want a hard-bristled toothbrush. Stiff bristles get into the cracks and seams of the miniature, doing a much better job of cleaning out release agent than a softer bristled brush, which cleans less aggressively.
Be careful of fragile areas of the miniature, such as swords or spears that can bend or break if you apply too much pressure or scrub too vigorously.
You'll be amazed at how much detail you'll uncover once you giving a miniature a good cleaning. Often, rough surfaces become smoother. Metal miniatures often shine after removing release agent.
The best miniatures are those with the best details, so don't sell your minis short. Give them a good scrub. You'll love the difference in how much better your miniature looks.
Next you'll learn how to get rid of the last signs of the casting process, "flash" and mold lines